PS4 PRO HDMI Replacement
Note: Replacing HDMI requires experience and the right equipment!
On the CUH-1116 (PS4 FAT), PIN 4 on the new HDMI port may show red before the first console startup. After the initial boot, the same PIN usually turns green on the tester – this is normal behavior.
● Issue Description
- Visible mechanical damage to the port or surrounding area.
- Video or audio signal depends on cable movement or position.
- No video or audio output, even though the console powers on.
● Diagnostics
- Inspect the HDMI port for physical or mechanical damage.
- Check the console indicator light – a solid white light means the console is working properly.
- Connect a controller to confirm that the console responds to input.
- Perform a diode test as shown below. Readings may vary slightly, but focus on the correct position of the green, red, and white pins – they indicate proper signal line continuity.
HDMI diode test: PS4 FAT
GND
1
0.61
2
0.07
3
0.53
4
0.53
5
0.07
6
0.53
7
0.53
8
0.07
9
0.53
10
0.54
11
GND
12
13
GND
14
0.07
15
0.54
16
0.52
17
OL
18
0.64
19
0.64
20
0.07
21
0.66
22
0.64
23
OL
24
GND
HDMI diode test: PS4 SLIM
GND
1
0.53
2
0.07
3
0.53
4
0.53
5
0.07
6
0.53
7
0.53
8
0.07
9
0.53
10
0.54
11
GND
12
13
GND
14
0.07
15
0.54
16
0.52
17
OL
18
0.64
19
0.64
20
0.07
21
0.65
22
0.63
23
OL
24
GND
HDMI diode test: PS4 PRO
GND
1
0.53
2
0.07
3
0.53
4
0.53
5
0.07
6
0.53
7
0.53
8
0.07
9
0.53
10
0.54
11
GND
12
13
GND
14
0.07
15
0.54
16
0.52
17
OL
18
0.64
19
0.64
20
0.07
21
0.65
22
0.63
23
OL
24
GND
● Repair Steps
- Use hot air at around 420°C with airflow level 2–3. Preheat the board to approximately 160°C.
- Apply flux and a small amount of fresh solder to prepare the joints.
- Heat the area evenly – using a soldering iron may help to release the pins more easily.
- Be careful with the small SMD components located behind the HDMI port – they can be easily displaced or damaged by excess heat.
- Clean the solder pads thoroughly once the damaged port is removed.
- Align and solder the new HDMI port in place, ensuring all pins are properly seated.
● Testing
- Perform another diode test to confirm correct readings.
- Connect the console to a display and verify that both video and audio output work correctly.
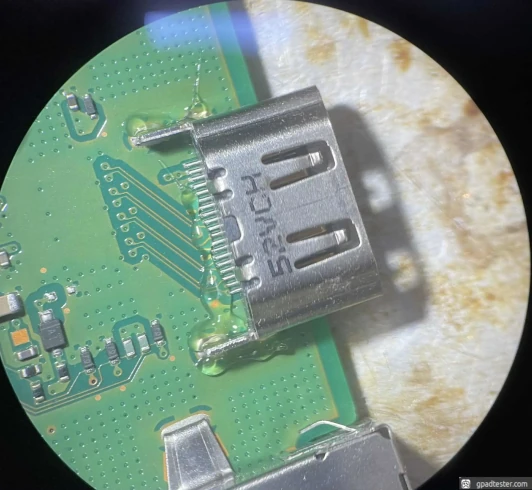
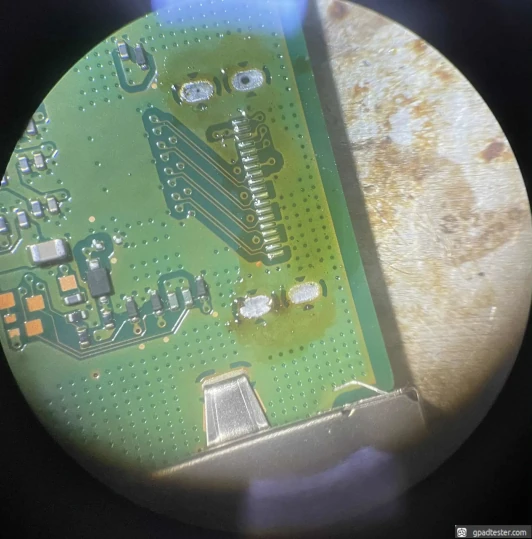
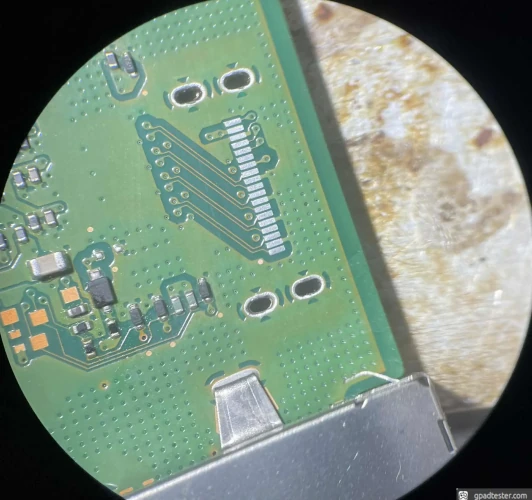
● Gallery